
What are the steps in changing your engine oil?
- Gather all necessary materials
- Prepare yourself and your vehicle
- Flush out the old engine oil
- Add new oil and oil filter
- Check and document the oil change
One of the most basic, yet most important parts of vehicle maintenance is changing engine oil. Although this goes for all types of automobiles, there’s no denying the fact that commercial trucks, Japan Surplus from the Philippines or not, have more need for it than others. The reason for this is the number of miles a commercial truck logs in on the daily and the frequency at which engine oil needs to be changed.
On average, this maintenance task needs to be done and varies every 5,000 miles (8,046.72 km) or 7,500 miles (12,070.08 km) depending on loads they carry, road conditions, duty cycle, oil grades, and quality. These are numbers and factors that commercial trucks can reach in a relatively short amount of time, compared to leisure vehicles, at least. With their jam-packed schedule and the long roads they travel, it wouldn’t be unusual for these vehicles to accumulate these miles in a month or two. This then means that they’d have to change oil relatively frequent.
When the time comes, drivers or owners can choose to leave the job up to an expert mechanic or take them on themselves. Between these two, we highly recommend the latter solely because it’s a fairly easy job that anyone can do. We’d even guide you through the process, so read more to find out how to safely and properly change your engine oil!
Gather All Necessary Materials
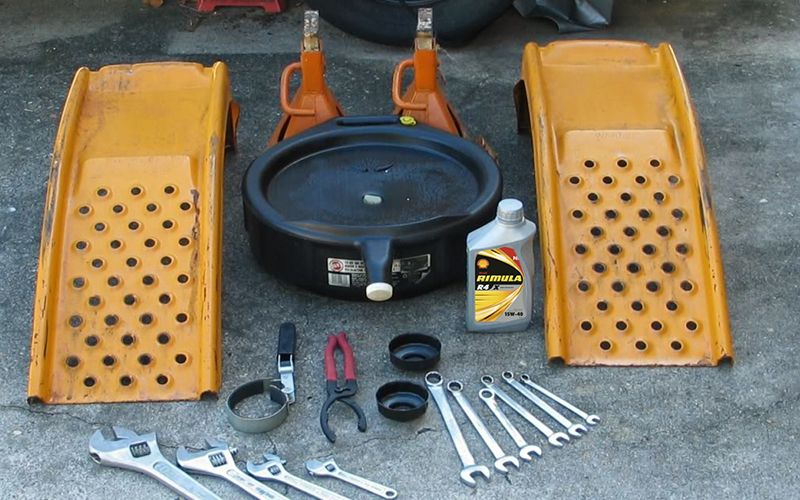
The very first thing you have to do before you tinker with your vehicle is to make sure that you have all the materials necessary for the job. These necessities are:
- Drain pan
- Regular wrench
- Oil filter wrench
- Funnel
- Replacement oil filter
- Replacement oil (that meets manufacturer requirements; check owner’s manual)
- Personal protective equipment (PPE)
- There are also materials that you may or may not need depending on the situation which are:
- Jack and jack stands
- Mechanics creeper
- Replacement drain plug washer
In order to access the drain plug, you’re going to have to get under your vehicle. This is where you might need the jack and jack stands. If there isn’t enough ground clearance (meaning the space between the undercarriage and the ground isn’t enough to fit you), then you’re going to jack up your vehicle.
As for the creeper, it’s purely for your comfort and convenience. It can be left out if you are willing to wiggle your way underneath the vehicle. It’s also your call whether you want to replace the drain plug washer or not, but sometimes they’re so worn out that it becomes a necessity.
Prepare Yourself and Your Vehicle

After you have gathered all the needed materials, the next course of action is to prepare yourself and your vehicle for the job. Changing oil may be a simple task, but it still comes with risks just as any job, so it’s important that you wear appropriate personal protective equipment. In this case, a pair of latex gloves to keep your hands free of grime and safety glasses to keep oil and debris out of your eyes would suffice.
Once you’ve readied yourself, we move on to your vehicle. Your truck’s engine and oil should be warm and neither hot nor cold. So if you’ve just gotten back from a long drive, let the truck cool down for a few hours before doing anything. If, on the other hand, you haven’t used the vehicle recently, then turn it on and let it run for a few minutes. After which, park it on a flat and level surface and make sure the parking brakes are engaged.
There might also be a need to raise your vehicle as stated earlier, so do that properly. Support the truck with safety stands and don’t depend on the jack alone because that won’t be strong enough to carry the weight. Some vehicles are equipped with an undercover for aerodynamic purposes and it may hide the engine’s oil drain plug. Remove that accordingly and set it aside somewhere it won’t get damaged.
Flush Out the Old Engine Oil

With materials and safety preparations out of the way, you can now start the maintenance job. The first step to this is to flush out the old engine oil. This is perhaps the hardest part of the entire process, so make sure you do it carefully.
While carrying the drain pan and regular wrench, slide underneath your truck and find the oil pan. To make things easier, consult with the vehicle’s manual for its location. Once you’ve gained access to the part, look for the bolt or plug at the end of it (this is the drain plug) and put the drain pan underneath. With the pan in place, remove the plug and let the oil flow until the oil pan is completely empty.
After the oil has drained, clean the plug and screw it back in with your hands, then switch to the wrench and tighten it with a quarter or half rotation. This ensures that it’s tight enough that there won’t be a leak but not too much that it isn’t going to damage the rubber seal.
Add The New Oil and Oil Filter

Now that your oil pan’s clean and empty, it’s time to replace the oil filter and oil. While underneath the vehicle, you should easily be able to locate the oil filter. Place the drain pan underneath it to avoid spillage and start unscrewing the part. You can do this by hand or with the oil filter wrench.
Place the removed part in a plastic bag for proper disposal and set it aside for now. You can now grab your replacement oil filter and dab some new oil around its rim to ensure a good seal. With that done, hand tighten the filter and then finish the job off with the oil filter wrench. You can now safely get out from underneath the vehicle as there’s nothing more you need to do there.
Locate the engine and rid it of all possible debris or contaminants that may enter the oil tank. Unscrew the oil cap, often located on the left side of the engine, and place the funnel into the opening. Pour the recommended amount of oil into the vehicle (this should be indicated in the manual) and then screw the oil cap back on and close the hood of your truck.
Check and Document the Oil Change
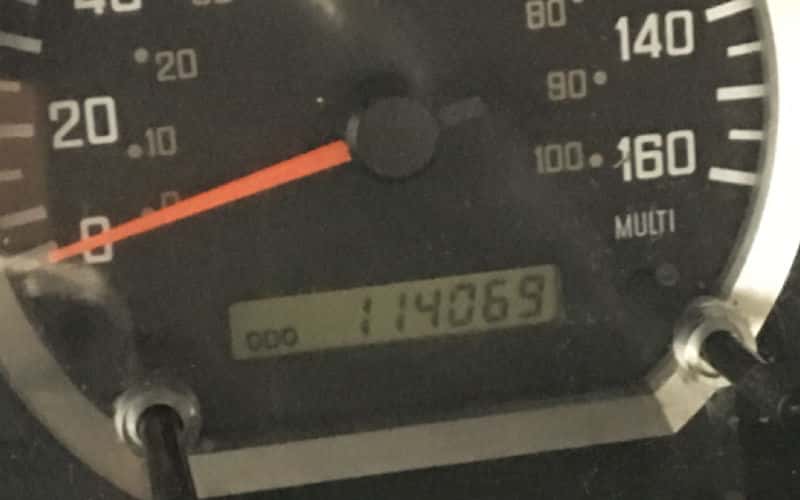
There’s one final thing you have to do before you can take your vehicle out of the garage and that’s to document the oil change and check the mileage on your odometer so you know when to do it again. It also pays to let your engine run for a few minutes before completely using it for your next order of business.
Key Takeaway
Changing your engine’s oil is not something you can choose to forego because it’s going to affect the performance of your truck. It may even put you in danger on the road, so make sure to do this regularly. You can easily do this on your own regardless of what vehicle you drive – may it be a truck that is Japan surplus in the Philippines or a car from Isuzu Philippines!